

In a previous blog entry, Three Tips for New Google Sites Makers, I shared suggestions for setting up your new Google Sites website. In this blog entry, we will explore three more tips. These suggestions answer questions colleagues have shared with me about their use of the new Google Sites.
Tip #4 – Embedding HTML Content
Embedding content into a page on the New Google Sites was a bit of a challenge. Now, you can paste embedded code into a Google Sites page. You can drop YouTube videos, Vimeo videos, and other content that features embedded codes. For example, let’s say you have a Microsoft Sway crea tion you want to embed on a Google Sites page. Let’s follow these steps:
- Locate the embed code on the source site (e.g. Padlet, YouTube, Sway, Vimeo).
- Copy the embed code.
- Open the Google Sites page.
- Click on the Insert when in Page Edit mode.
- Click on the Embed option, which now features a place to paste the website address (URL) or embed code.
- Paste the embed code from the source site.
You can see the steps outlined in the animated GIF shown above. Want to embed Twitter? Read this blog post.
Note: View the examples embedded on a new Google Sites page.
Tip #5 – Adding Images
Adding pictures and images to a Google Sites page remains easy. You need only take advantage of the following options: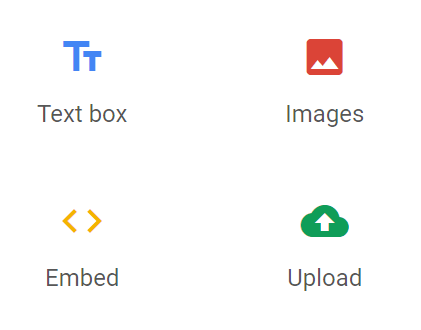
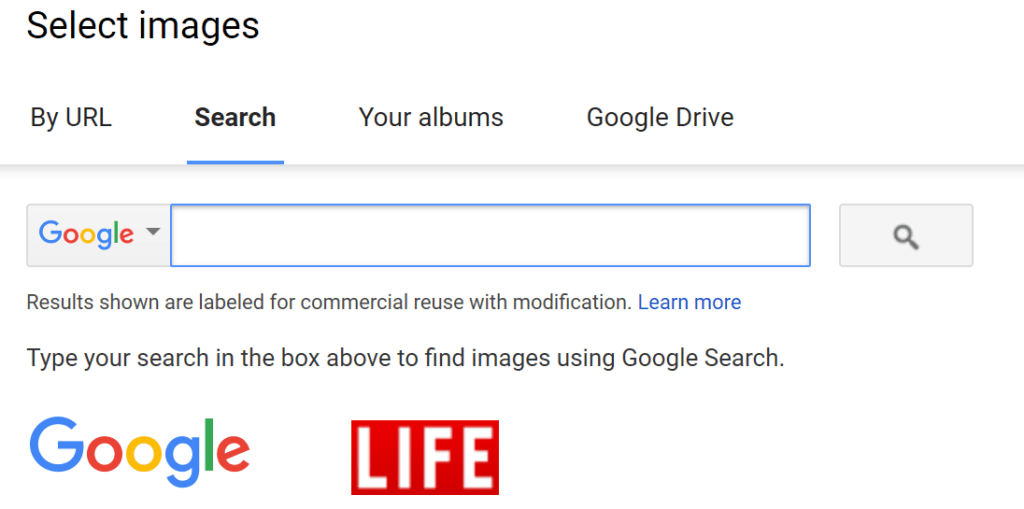
What you may not realize is that copy-and-paste works well, too. When working with Chrome or Firefox browsers, you can right-click and then copy-and-paste an image from anywhere on a web page (for example, from this list of twenty-five copyright-free image sites). Or you can rely on a screen capture tool such as Greenshot, NGWIN’s PicPick (my favorite on Windows), or OneNote app’s screen clipper. I often use PicPick (which allows for editing, adding text, and many other features) when saving an image to my computer, while using OneNote to capture part of the screen to my computer’s clipboard.
The former approach involves the Upload option, while the latter relies on the Ctrl-V (Paste) command. All images are stored in your Google Drive and associated with your Sites website. Of course, you can always just place images in your Google Drive or search Google:
My recommendation is to get PicPick. It’s an all-purpose image capture/editing tool for Windows that will save you some time preparing images for placement on a Sites page.
Tip #6 – Migrating from Classic to New Sites
Don’t let this tip title get your hopes up…yet. As of the time this blog entry was written, Google had not yet announced an easy way to migrate your “classic” Google Sites to the new Google Sites. The most recent update I’ve seen is dated from May 2, 2017 with an update of December 20, 2017. In this blog entry, Google states the following:
In Q1 2018, we’ll launch an admin preview of features in the classic Sites that will help site owners migrate their content to the new Sites. Later in 2018, we’ll open up these features for site owners and provide a management dashboard to G Suite admins that will enable them to effectively manage the migration process.
With over ten classic Sites, I am waiting to see how migration will take place. In the meantime, you can take several steps to copy-and-paste content over on your own. Some suggestions:
- Make sure your Gmail account has editor rights in both classic and new Sites.
- Copy-and-paste of text, images, and embedded content works much better now than it did a few months ago. Google makes every effort to bring images over.
- Take the opportunity to dump old content.
Of course, that last bullet may not apply if you have a website that is an archive site. For now, we will have to wait until Google makes the migration tool available.
WAIT, THERE’S MORE!
Interested in learning more about the new Google Sites? Here are four more time-saving features that have popped up:
- Click the button to get a link to the published page. This is a time-saver, saving you from having to select “Publish” and then going back to “View Published Site.” Now, you just click on the button (
 ) at the top right-hand side of the page. This will give you the link to the published page.
 - Click and copy entire blocks. With one click, you can select a block of content, copy and then paste it to another page in the Sites website or another Sites altogether.
- Rather than use the Embed option, simply press Ctrl-V on Windows (or Command-V on a Mac) to paste a website address. This works quite well with the embedding of Google Docs, Slides, and YouTube videos.
- Speaking of YouTube videos, you can right-click on a YouTube video at a certain time, then copy-and-paste that video with the designated start time into your Sites page. Viewers will see the video start when you want rather than at the beginning, a feature often missed when embedding videos in Google Slides.
The new Google Sites is shaping up to be quite versatile. Unlike some of the competing products, you can depend on the web page address to stay static rather than change after Google Sites performs an update. I hope Microsoft OneNote developers are reading this.