

Keeping parents informed about their child’s progress is a critical, but very time-consuming job in education. But it can make a huge difference in that child’s learning. Parent involvement in a child’s academic life has a positive impact and can motivate students to learn and behave appropriately. Often, parents want to be supportive of what is happening in the classroom, but lack information on how to accomplish that. Given that there are over four billion email accounts, chances are that the parent/guardian of the child has an email account. In this blog entry, we’ll explore three simple ways to provide parent communication using Google Sheets and a convenient add-on to help automate this process a little. You can find step-by-step instructions on how to add them at the bottom of the blog entry.
Parent Communication Tool #1 – Form Mule
Take advantage of the Google Sheets’ add-on Form Mule. It allows you to quickly create information in Google Sheets and then “email merge” it together. This can result in nicely nuanced messages as you create specific feedback or share information. Comments can be placed in different columns. Some examples of English comments can be seen in this blog from Scholastic and Spanish ones are available here. Of course, you can come up with your own as well or use whatever comments your district or campus has approved. I’ve borrowed a few of them for the examples below.
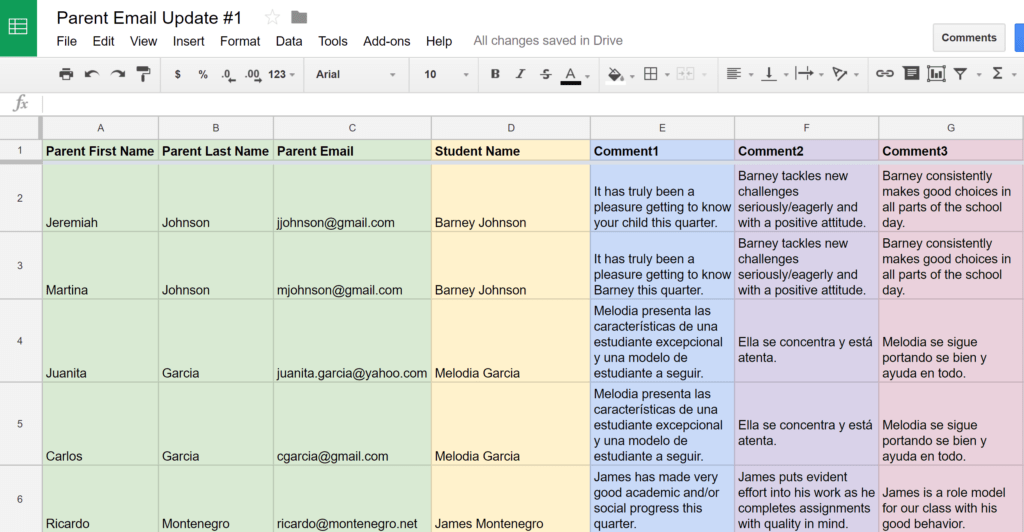
Note: Comment examples may not be suitable in some districts. Consult FERPA and school administrators in your area. When in doubt, keep it positive and do not reveal personal details via emails. More on this point below.
Once you have your comments customized for students, you are ready to take advantage of FormMule. Note that you can get even fancier with email updates. Do this by using the concatenate function in a spreadsheet. This function enables you to combine a student’s name with your comments which lets you create generic comments for students while “dropping in” the child’s first name. This may become a necessity with large classes where you may want to have consistent remarks for each student. Notice that in the example above, I’m able to offer English/Spanish-specific feedback in the comments.
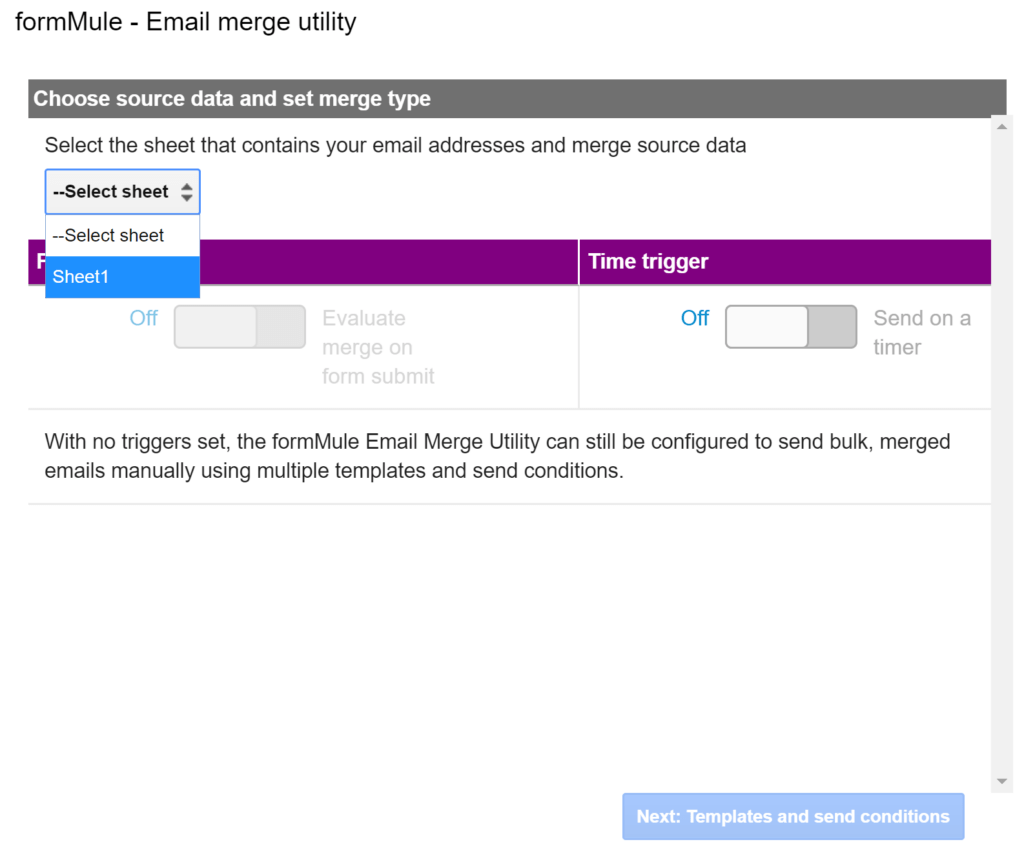
To begin using FormMule, go to your Add-Ons menu in Google Sheets. Then select “Launch” from FormMule. FormMule presents itself with the first screen shown below. You simply have to make a few selections to get started. You can also watch this video for more tips.
Step 1 – Select Your Sheet
Most Google Sheets come with standard titles for each sheet in the spreadsheet. The standard name is “Sheet1,” and FormMule expects you to select the correct sheet from a drop-down list. Simply select “Sheet1” and click on the blue button labeled “Next: Templates and Send Conditions”
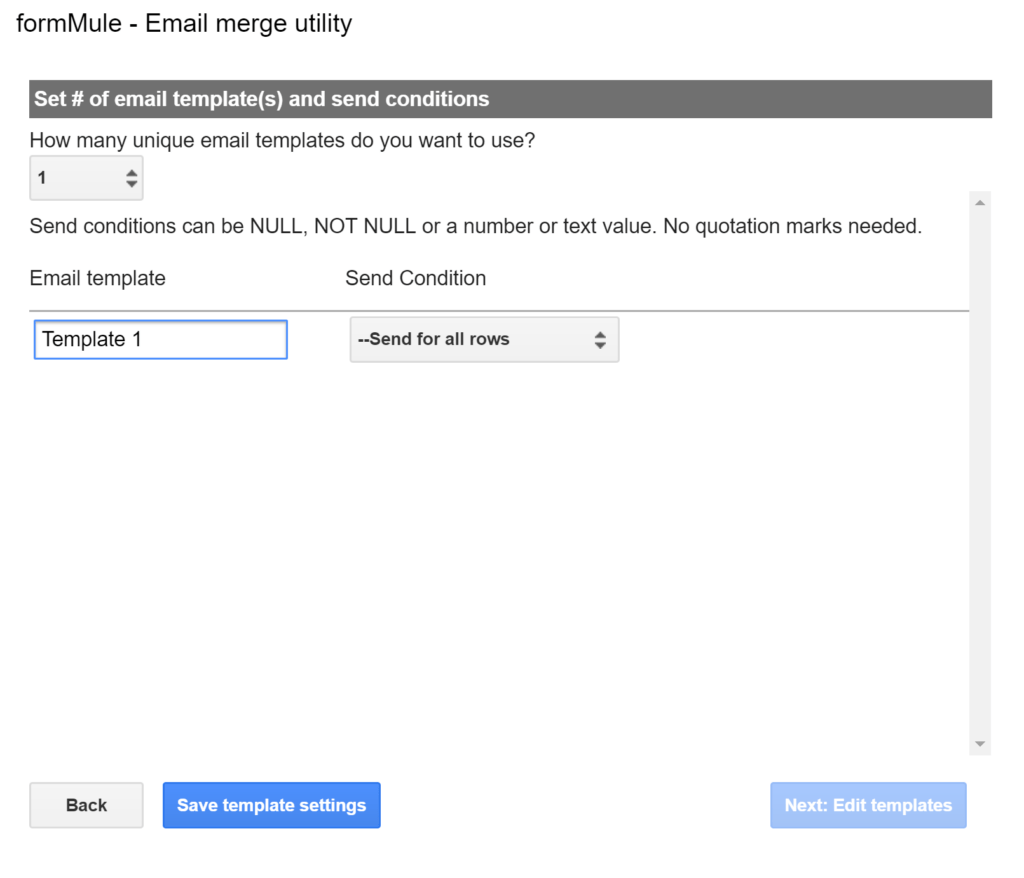
Step 2 – Save Your Template
While FormMule offers several features you may want to explore later, let’s be brief this first time. Simply leave the settings below as they are. Click the “Save template settings” blue button at the bottom of the screen and then select “Next: Edit templates.”
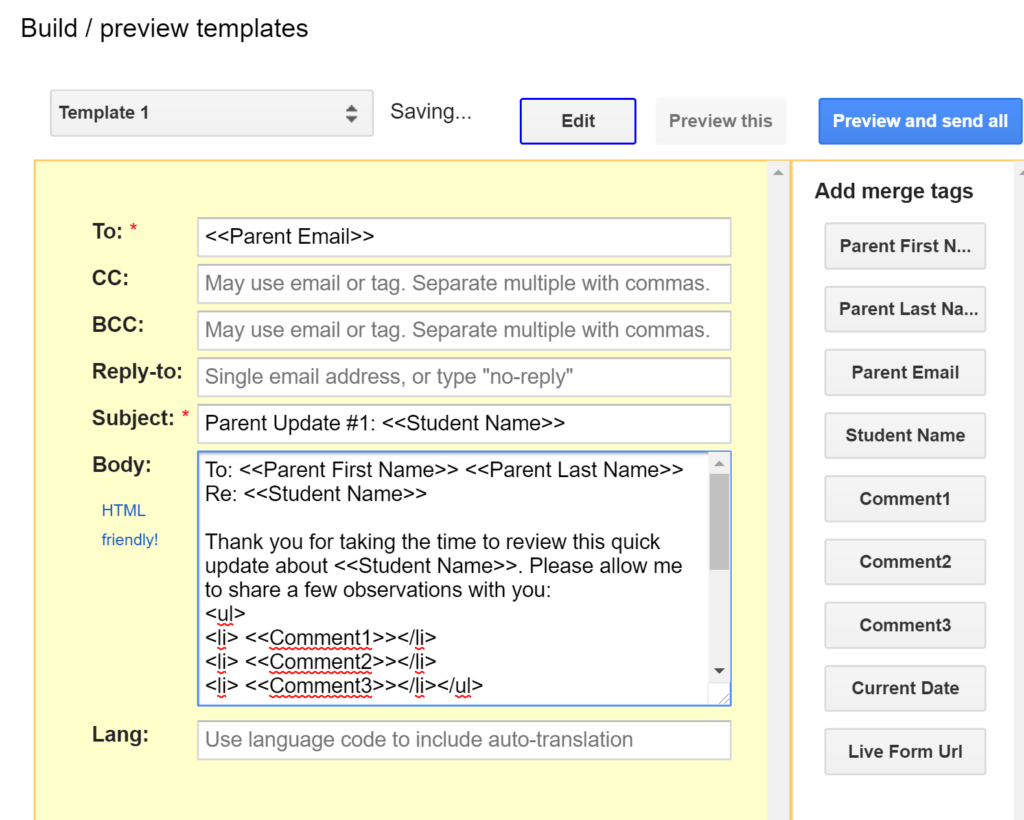
The next step involves actually writing your email, then embedding mail merge elements (the column headers in your Google Sheet) into the email. These elements are offset by greater than and less than symbols <<ColumnHeader>>. Below, you can see an actual example:
Notice that the following is true of the example shown above:
- You can mix your email with various elements shown on the right. You can also include HTML formatting tags (such as the use of <ul> and <li> to get an unordered or bulleted list
- When you insert an element from your spreadsheet, you can identify it with greater than/less than symbols
- To get true customization for other languages, you could create your welcome message as its own comment in your spreadsheet
Here’s what the end product will look like in Preview for two of the students, Barney and Melodia:

The final steps involve clicking “Preview and send all” and then send. Provided the email addresses are correct, your students’ parents will receive the emails.
Parent Communication Tool #2 – Yet Another Mail Merge (YAMM)
A less robust tool for sending emails than FormMule, Yet Another Mail Merge relies on draft messages you’ve put together in Gmail. It pulls those emails up from your DRAFTS (you can “Compose” a message, then save it to the DRAFTS folder in Gmail). The email is addressed using email addresses that you’ve prepared in a Google Sheet and allows you to quickly “spam” or bulk email people. The main benefit of YAMM is that you can add file attachments to your DRAFT email. The email attachments, of course, are sent when you use the YAMM add-on. This is helpful when you have prepared a paper form or publication (digital newsletter) in PDF format that you need to distribute. You can watch this short video tutorial if you would like to see how to use YAMM.
Parent Communication Tool #3 – Email Parents
Google wizard Alice Keller has also created a Google Sheets add-on known as Email Parents. Alice provides an illustrated tutorial of her add-on online at her blog Teacher Tech with Alice Keeler.
Some Final Points
Consider that email updates to parents are a great opportunity to connect. Be sure not to violate FERPA rules when it comes to them however (it will vary depending on your state and district policies). While you may find the sample comments provided in this blog entry to be a bit too revealing, you can always adjust your comments to be less revealing of student academic or behavioral progress. “There is good reason to believe that emails, texts, Tweets, and other digital communications between teachers, administrators, parents, and students about students are not student records unless they are maintained in the student’s file,” points out this blog entry. Remember to be professional in your communications and take care when entering emails for parents. It wouldn’t do to mix up updates for one student with another’s parent/guardian.
Addendum: How to Add Google Sheets Add-Ons
You can find a variety of Google Sheets add-ons. Here’s a quick overview of how to get to them:
- Open Google Sheets by doing one of the following:
- Go to Google Drive and create a new Sheet OR
- Go to to Google Sheets
- Click on Add-Ons and select “Get Add-Ons.” You can see what this looks like below:
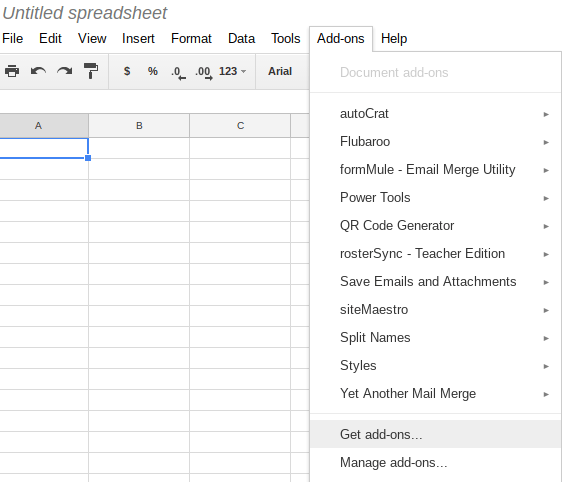
As you can see from the picture shown above, there are several add-ons already set up. You may not have any add-ons, so your list will be quite short. When you click on “Get add-ons,” you will see a screen similar to the one below:
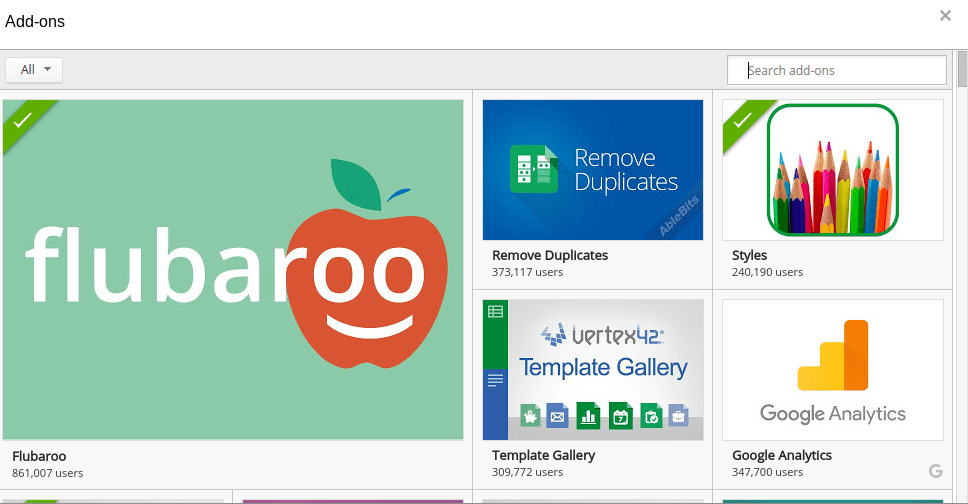
In the top right-hand corner, you can search on specific add-ons you will be adding from this blog entry. When you select an add-on, you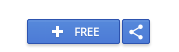 may be prompted to give permission to the add-on. Do so. You will be expected to quickly click through a series of screens. Next to new add-ons you are considering selecting, you will see the plus symbol with the word FREE next to it. Click this button to select the add-on for use in your Google Sheet.
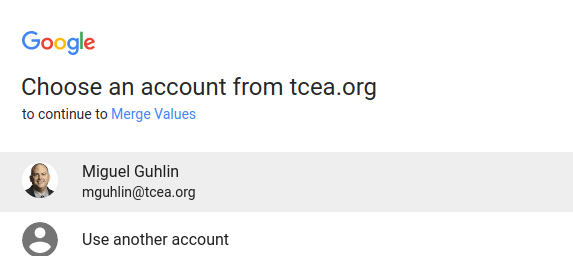
The next screen you will see is an account selection. Many of us have multiple Gmail accounts, such as one from work or personal. Below, you can see a typical screen:
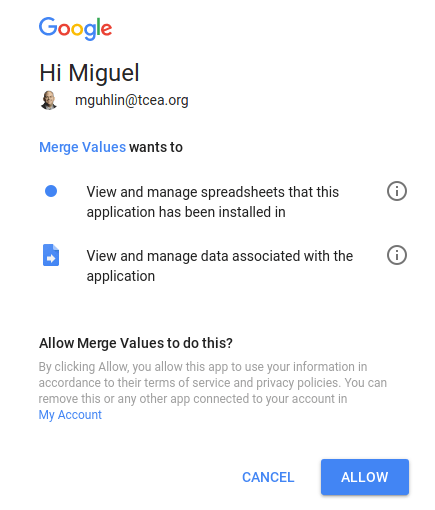
The last screen you will see is a permission request. Google will ask if you want to ALLOW this add-on to do what it needs to so it may be added to your Google Sheets.
Now, once you’ve finished these steps, you will be able to go to your Add-ons menu and then select the new add-on you selected previously.